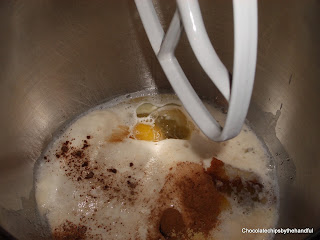
I decided to try out this pumpkin bread to give to our neighbor friend. I liked the fact that it was a real bread, not a sweet quick bread like pumpkin bread usually is. It kind of reminds me of a pumpkin bread I got at the Moscow food co-op, when my family was in Pullman for graduation a month ago.
This bread was amazing. It had spice that you taste first and then the hint of sweet and pumpkin. I used the pumpkin puree I made here.
Pumpkin Yeast Bread
Annie's Eats
Ingredients:
½ cup warm water
1½ tbsp. instant yeast
2/3 cup warm milk
2 large eggs
1½ cups pumpkin puree
2 tbsp. vegetable oil
½ cup brown sugar
2 tsp. salt
½ tsp. ground cinnamon
¼ tsp. ground ginger
¼ tsp. ground nutmeg
Dash of ground cloves
Dash of Allspice
6½ cups bread flour (approximately) -I substituted about 1 1/2 cups with whole wheat flour
Directions:
First proof the yeast by dissolving the yeast in the warm water and adding a little sugar. In the bowl of an electric mixer fitted with the paddle attachment, pour yeast mixture, milk, eggs, pumpkin, oil, brown sugar, salt, and spices. Mix briefly to combine. Add 4 cups of the bread flour to the bowl, and mix until a sticky dough has formed. Switch to the dough hook. Knead and add flour until the dough has a good consistency and is not sticky. Cover the bowl with a damp kitchen towel or plastic wrap sprayed with cooking spray and let the dough rise until doubled in bulk, about 1 hour - I usually let mine rise as long as I have time for until it's doubled.
Turn the dough out onto a lightly floured work surface - I don't use flour for this I just use cooking spray to spray the surface and my hands. Divide in half. Press or roll with a rolling pin each piece into a rectangle about 1 inch thick and no longer than 9 inches long - just roll it out in to a longish rectangle making sure the short side is about the length of the pan you will use. With the long side of the dough facing you, roll the dough firmly into a cylinder, pressing down to make sure the dough sticks to itself. Turn the loaf seam-side up and pinch the seam closed. Place the loaves in two well-oiled 9 x 5-inch loaf pans and press down gently so the dough touches all four sides of the pan. Cover with a towel and let rise until almost doubled, about 45 minutes.
Preheat the oven to 375° F. Bake the loaves for about 30 minutes, or until an instant-read thermometer inserted into the loaf reads 190° F. Transfer to a wire rack and let cool.
 |
| Ready to switch to the dough hook |
 |
| Too thin and sticky. Spatula slides thru instead of cutting |
 |
| Dough is thicker now, spatula can cut thru the dough |
 |
| Another way to tell the dough has enough flour is the slap test. Here the dough is thick enough. If you push the spatula in the dough and pull it out slowly the dough will stick. |
 |
| But if you slap the dough with the spatula it will not stick and the spatula will come away clean. |
 |
| Rolling out the dough after it's risen once. Roll it out with the pan near so you can make sure the short side is about the length of the pan. |
 |
| Squish the dough down in the pan. |
 |
| Rising |


No comments:
Post a Comment
Leave a comment! Especially if you made the recipe!